My workflow for publishing articles
After writing & publishing articles for about two years (consistently), I’ve sort of created a system when it comes to publishing an article. From ideation to hitting the publish button.
Of course, this system is ever-evolving and over the years, I’ve tried to tweak it to suit my needs. And today, I think it has reached to a point where I can share it with you and allow you to peek into this very “system”.
Ideation
A couple of years ago, when I started this blog, I was used to writing casually and back then i.e. I was only used to post articles whenever I feel like. But from the previous two years, things have changed. I’ve started to take it more seriously and started publishing articles quite frequently. Almost daily (of course, with a few exceptions).
You might be asking how I’ve started writing so much? And where do I get ideas from?
The answer to all these questions is “From teaching things to myself”. In a nutshell, whenever I’m in a situation where I don’t get certain concepts correctly, I would first try to understand the topic thoroughly. And when things get clear for me, I would try to depict the concept in my words. In a way that can make me understand whenever I look upon it next time.
That means I primarily write articles for myself only. And if anyone gets benefitted from my articles, it would be an added bonus!
Writing the Article
Next, for writing articles, I’m using VS Code because articles are written in Markdown and nothing is better than the VS Code’s built-in support for Markdown in my opinion. To get started with a brand new article, all I need to do is whip up a blank Markdown file and pour my heart out in it. It’s as simple as that.
To make this even better, I use a VS Code extension called Markdown All in One which add some essential things such as keyboard shortcuts, table of contents, auto preview, and more when it comes to Markdown. It saves tonnes of time fiddling around some Markdown quirks.
Fixing the Article
Once the article has been written, I head to grammarly.com and paste in my entire article to check for spelling and grammatical mistakes. And once it detects those errors, it can fix those in a cinch.
On top of this, it also suggests alternative words and removal of unnecessary words which can make the entire reading experience a pleasant one.
Back then, I was not very concerned regarding making my articles grammar-correct. But over time, I realised it’s important from the perspective of a reader because I’m also an avid reader myself. And so the grammar correction step entered into my workflow.
Creating Social Banner
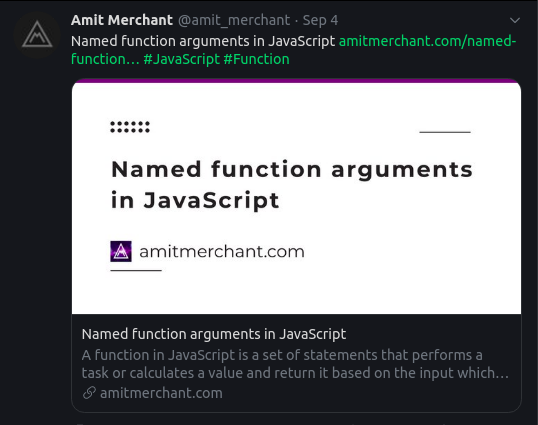
Now is the time to create a nice social banner for the article. It looks something like so on Twitter.

A lot of content creators ignore this but in my opinion, it is a really important thing if you’re posting your articles across different social media platforms. It can make your article stand out because images can grab users’ attention more quickly than the text.
I use a service called Crello where I create social banners every time I write a new article. The banner contains nothing but the title of the article but alas! in big and attention-grabbing fonts. It’s all handmade.
Publishing the Article
At this moment, everything is in the place and the article is ready to be published. For publishing the article, all it takes is a simple git push in my case as I’ve hosted my blog on GitHub Pages and it triggers the new build on every Git push.
Once the code is pushed, it would take 30-45 seconds to make the article live on the holy internet!
And that completes my entire workflow from ideation to publishing an article. I’ve been following this workflow from the past two years and it has suited me very well and I’m hoping the continue it for some more time!
Like this article? Consider leaving a
Tip👋 Hi there! I'm Amit. I write articles about all things web development. You can become a sponsor on my blog to help me continue my writing journey and get your brand in front of thousands of eyes.


