Building LinkSnatch — A bookmarks app with Next.js and Tailwind CSS
For a long time, I have been meaning to learn Next.js and Tailwind CSS. And the best way, I know, to learn something is to build something with it.
Apart from this, I haven’t built something from the scratch for quite a while. I wanted to get out of this slump pretty badly. And so, I decided to build something that I would use in my day-to-day life.
I have always wanted something where I can jot down all the links that I come across everyday. And I have tried a lot of bookmarking apps but none of them really worked for me. So, I decided to build my own.
It’s called LinkSnatch.
I gave myself a few constraints while building it:
- The app should be minimal and distraction-free.
- It should be fast.
- The UI should be beautiful.
- Bare minimum features.
With that in mind, I started building it.
The Tech Stack
I decided to build LinkSnatch using Next.js and Tailwind CSS. I have never used Next.js before but I have heard a lot of good things about it. The same goes for Tailwind CSS.
So, I picked these two technologies to build LinkSnatch.
To get started, I used create-next-app to bootstrap the project.
I installed Tailwind CSS using the official Tailwind CSS with Next.js guide.
Next, I wanted to use some ready-made components for the UI. For things such as a responsive menu and dark mode. So, I decided to use Preline which is a collection of beautiful UI components built with Tailwind CSS. So, I installed it as well.
I used React Hot Toast to show toast notifications.
Lastly, for all the heavy lifting related to SEO, I used Next SEO which seems to be the most popular SEO package for Next.js at the moment.
With that, the project was pretty much ready to go.
The UI
The app mainly consists of two pages.
- A home page where you can add new links and search for existing links.
- An about page where you can read more about the app.
With Next.js, you can create pages in the pages directory. So, I created two pages in the pages directory with the names index.js and about.js. What I like about Next.js is that it automatically creates routes for these pages. So, the home page would be available at / and the about page would be available at /about.
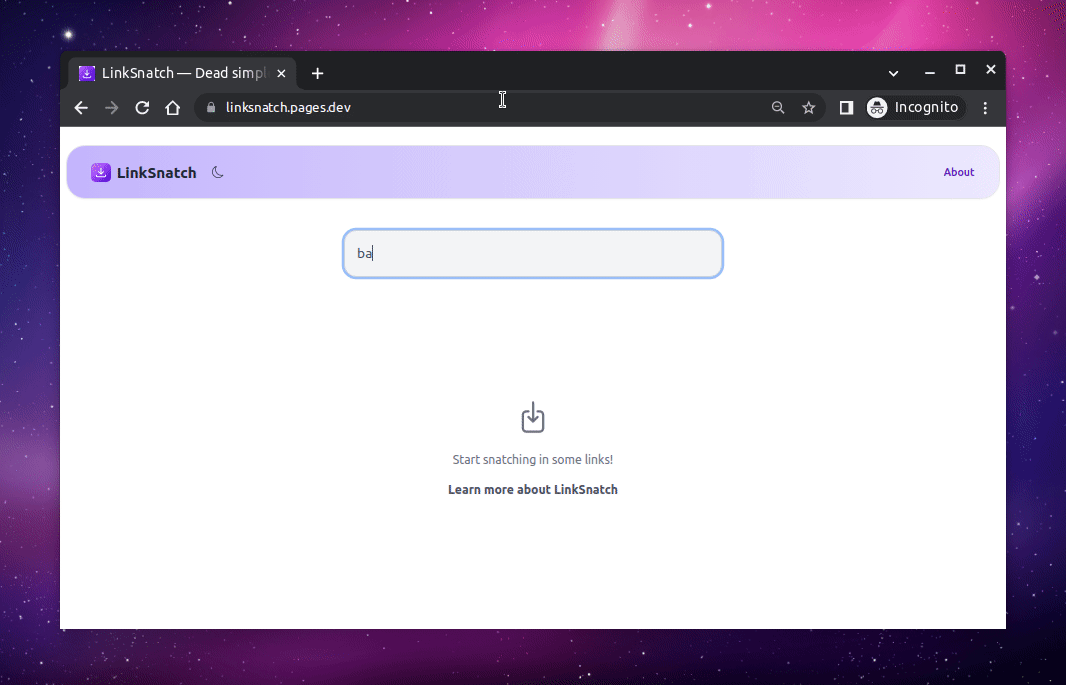
I wanted the UI to be minimal and distraction-free where there would only be a single input field and a list of links arranged in a grid. The input field would be used to add new links as well as search for existing links.
When the user paste in a link, the input field would indicate to the user that you’re now ready to save the link. And when the user clicks on the save button or hits enter, the link would be validated, extracts the URL metadata using jsonlink.io, and saves to the browser’s local storage as an array of objects.
Here’s how the array of objects would look like.
[
    {
        "id":"7s3wdmup",
        "title":"Apple",
        "url":"https://apple.com/",
        "timestamp":1677252014
    },
    {
        "id":"307tvwyv",
        "title":"Pixar Animation Studios",
        "url":"https://pixar.com/",
        "timestamp":1677252020
    }
]
The added link would then be displayed in a grid. The grid shows the domain name and the title of the link. There would also be a delete button to delete the link and a copy button to copy the URL to the clipboard.
Currently, the app keeps everything in the browser’s local storage. So, if the user clears the browser’s local storage, all the links would be gone. I am planning to add a backend to the app in the future so that the links can be synced across devices. But that’s a story for another day.
And that’s pretty much what it does. It’s a dead simple app.
Here’s everything in action.
The app is open-source and you can find the source code on GitHub.
Hosting
Once the app was ready, I wanted to host it somewhere. I have been using Cloudflare Pages for hosting my blog. So, I decided to use it for hosting LinkSnatch as well since I was already familiar with it.
I followed Cloudflare’s Deploy a Next.js site guide to getting started. And it was pretty straightforward.
And in a few minutes, I had LinkSnatch up and running.
Takeaways
I enjoyed building LinkSnatch. It was a great learning experience for me. I learned a lot about Next.js and Tailwind CSS. I had given myself a deadline of 5 days to build it with a tight scope. And I was able to build it within the deadline. So, I am pretty happy with the outcome.

👋 Hi there! This is Amit, again. I write articles about all things web development. If you enjoy my work (the articles, the open-source projects, my general demeanour... anything really), consider leaving a tip & supporting the site. Your support is incredibly appreciated!